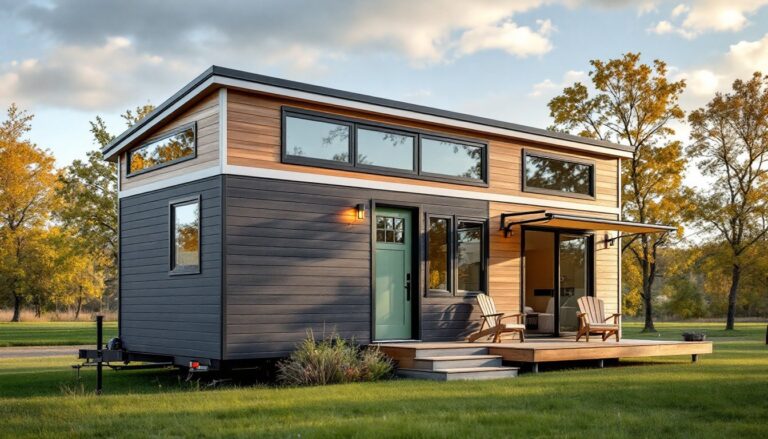
The Dallas-Fort Worth metroplex offers plenty of entertainment options, but sometimes the best seat in the house is your own living room. Whether you’re tired of crowded multiplexes or want a dedicated space to watch the Cowboys dominate on Sunday, a home theater delivers year-round comfort and convenience. With North Texas homes offering generous square footage and bonus rooms, DFW homeowners have a natural advantage when it comes to creating dedicated entertainment spaces. This guide walks through the planning, equipment choices, and installation steps needed to build a home theater that fits your space, budget, and DIY skill level.
Table of Contents
ToggleKey Takeaways
- A DFW home theater typically returns 50–70% of installation costs at resale, making it a smart investment for North Texas homeowners seeking added property value and entertainment functionality.
- Plan your DFW home theater in a dedicated room at least 12 feet wide by 15 feet deep, with appropriate seating distance (9–12 feet for a 75-inch TV, 12–16 feet for a 100-inch projector screen) and at least 9–10 feet of ceiling height for optimal setup flexibility.
- Invest in a quality 5.1 or 7.1 surround sound system with an HDMI 2.1 receiver and run auto-calibration software to achieve professional-grade audio balance and sound clarity in your theater space.
- Budget-friendly DFW home theater systems start at $2,000–$5,000 with a 75-inch TV and soundbar, while premium laser projector setups with Dolby Atmos can exceed $15,000–$50,000 depending on scale and professional installation.
- Minimize costs and maximize results by handling DIY installation for mounting, cable routing, and calibration, but always hire licensed electricians for new circuits and permit any structural changes required by local DFW building codes.
- Integrate smart home controls with voice commands and automated scenes—such as dimming lights and lowering screens with a single button—to transform your DFW home theater into a seamlessly connected entertainment experience.
Why Dallas-Fort Worth Homeowners Are Investing in Home Theaters
Home values in DFW have climbed steadily over the past decade, and functional upgrades like home theaters can add resale appeal, especially in markets like Frisco, Southlake, and McKinney where buyers expect entertainment-ready spaces. A well-executed theater room typically returns 50-70% of its cost at resale, depending on the quality of installation and market conditions at the time of sale.
Beyond property value, DFW’s climate makes indoor entertainment practical year-round. Summer heat regularly tops 100°F, and while winters are mild, outdoor activities aren’t always appealing. A climate-controlled theater space offers consistent comfort, whether you’re hosting a Super Bowl party or a family movie marathon.
The region’s growth in tech-savvy professionals has also increased demand for smart home integration. DFW homeowners are already installing whole-home automation systems, so adding a theater with networked audio, lighting control, and streaming capabilities fits naturally into existing setups. Many local electricians and AV installers are familiar with Lutron, Control4, and similar platforms common in newer builds across the metroplex.
Planning Your DFW Home Theater: Space and Layout Considerations
Start by evaluating available space. A dedicated theater works best in rooms at least 12 feet wide by 15 feet deep. Bonus rooms, finished basements (less common in DFW due to soil composition, but they exist), and converted garages are popular choices. If you’re working with a multi-purpose space, plan for light control and sound isolation from adjacent rooms.
Seating distance matters. For a 75-inch TV, sit 9-12 feet back. A 100-inch projection screen works well at 12-16 feet. Measure from the screen to the primary seating row, then add 2-3 feet behind for walkways and riser clearance if you’re adding tiered seating.
Ceiling height affects screen size and projector mounting. Standard 8-foot ceilings work fine for smaller setups, but 9-10 feet gives more flexibility for drop-down screens and overhead speakers. Check for existing HVAC vents, ceiling fans, and recessed lighting that might interfere with a projector mount or screen placement.
Electrical and wiring prep should happen early. You’ll need at least two dedicated 20-amp circuits, one for AV equipment, one for lighting and accessories. Run in-wall rated speaker wire (CL2 or CL3 rated) before closing up walls. Conduit for HDMI cables future-proofs the install and makes upgrades easier. If you’re doing this retrofit-style in an existing room, surface-mount raceways or a competent low-voltage installer can handle routing without major drywall surgery.
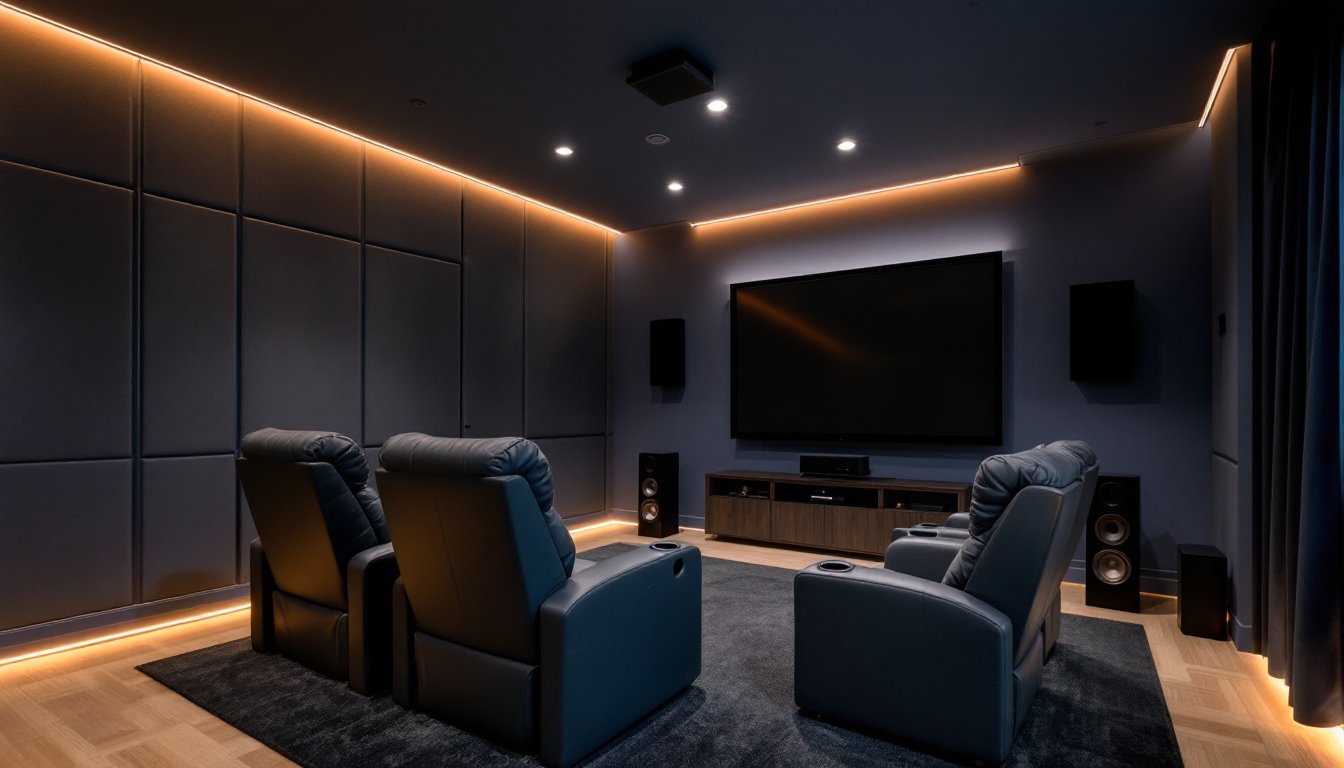
Essential Equipment for Your Home Theater Setup
Display: Decide between a large-format TV or a projector system. TVs (75-85 inches) are brighter, work in ambient light, and require no bulb replacement. Projectors deliver true cinema scale (100+ inches) but need a dark room and periodic bulb or laser module service. If you’re going the projector route, short-throw models reduce the throw distance, useful in smaller DFW bonus rooms.
Receiver and speakers: A 5.1 or 7.1 surround sound system covers most needs. That’s a center channel (dialogue clarity), left/right front speakers, surround speakers, and a subwoofer. Receivers rated 80-100 watts per channel handle typical rooms without strain. Look for HDMI 2.1 inputs if you’re connecting a PS5, Xbox Series X, or 4K Blu-ray player, this supports 4K at 120Hz and eARC for high-res audio.
Speaker placement follows the same logic whether you’re in Plano or Fort Worth: center channel at ear level, front speakers flanking the screen, surrounds at or slightly behind the main seating row. Mount speakers directly to studs using lag bolts, not drywall anchors.
Source devices: A 4K streaming device (Apple TV 4K, Nvidia Shield, Roku Ultra) or media server handles most content. Add a UHD Blu-ray player if you want the highest-quality video without compression artifacts. Some of the top-rated systems in 2026 combine smart streaming features with simplified setup for non-technical users.
Audio Systems and Soundproofing Tips
Audio calibration: Most receivers include auto-calibration systems (Audyssey, YPAO, Dirac Live) that use a microphone to measure room acoustics and adjust EQ and delay. Run calibration from the primary seating position. You’ll hear a series of test tones, it takes 5-10 minutes but dramatically improves sound balance.
Soundproofing basics: North Texas homes with wood-frame construction and drywall don’t offer much sound isolation. Add a layer of 5/8-inch drywall over existing walls using Green Glue damping compound between layers, it reduces sound transmission by 8-10 dB. Seal gaps around doors with weatherstripping, and consider a solid-core door instead of a hollow-core.
For floors, mass-loaded vinyl (MLV) under carpet or luxury vinyl plank reduces bass bleed to rooms below. If you’re on a slab (common in DFW), you won’t have downstairs neighbors to worry about, but sidewall treatments still matter for adjacent bedrooms.
Acoustic panels: Place 2-4 fabric-wrapped fiberglass panels (2-inch thick, NRC 0.95 or higher) on the front and side walls at reflection points. This reduces echo and tightens bass response. Skip the egg-crate foam from Amazon, it doesn’t absorb low frequencies effectively and can be a fire hazard if not rated.
Budget-Friendly vs. Premium Home Theater Options
Budget tier ($2,000-$5,000): A quality 75-inch 4K TV, 5.1 soundbar system or entry-level receiver with bookshelf speakers, and a streaming device. You’ll handle installation yourself, using existing furniture for seating. Paint the room a darker color, add blackout curtains, and you’ve got a solid setup. Tested models from expert reviews often highlight compact systems that fit this price range and deliver surprising performance.
Mid-range ($5,000-$15,000): A 100-inch projector with motorized screen, 7.1 speaker system from brands like Klipsch or SVS, acoustic treatments, dedicated theater seating (recliners with cupholders), and ambient lighting control. You might hire an installer for wiring and calibration but handle room prep and painting yourself.
Premium ($15,000-$50,000+): Laser projector with 4K HDR, Dolby Atmos ceiling speakers (7.2.4 configuration), custom acoustic design, tiered seating with buttkickers (tactile transducers), programmable lighting scenes, and integrated control via Crestron or Control4. Professional installation and design are standard at this tier. If you’re pursuing a high-end build in areas like Highland Park or Westlake, working with specialized installers ensures the system integrates smoothly with whole-home automation.
DFW’s cost of living is lower than coastal metros, so labor rates for AV installers typically run $75-$125 per hour. Material costs are comparable nationwide, but local suppliers in Dallas and Fort Worth often stock commercial-grade gear at competitive pricing.
DIY Installation Tips for DFW Homeowners
Mounting the TV or projector: Use a stud finder to locate framing. For TVs over 55 inches, mount to at least two studs using a full-motion or tilting bracket rated for the weight. Check the VESA pattern (bolt spacing) on the back of the TV and match it to the bracket. A torpedo level keeps the mount straight, eyeballing it leads to a crooked screen that’ll haunt you every time you sit down.
Projector mounts attach to ceiling joists. If joists run parallel to your desired mount location, install a 2×6 board between two joists and lag the mount to that. Use 3-inch lag screws into solid wood, not just into drywall or popcorn texture.
Running cables: For in-wall speaker wire and HDMI, use CL2 or CL3 rated cable, it’s required by NEC Article 725 for safety in wall cavities. Use a flexible drill bit or fish tape to route cables between studs. Avoid running low-voltage wire parallel to electrical wiring for more than a few feet, crossings at 90 degrees are fine, but parallel runs can cause interference.
Safety first: Wear safety glasses when drilling overhead and a dust mask if cutting into drywall. Use a non-contact voltage tester before drilling into walls to avoid hitting live electrical wires. If you’re unsure about anything involving electrical panels or load calculations, call a licensed electrician, Dallas and surrounding cities enforce the NEC, and unpermitted work can affect homeowner’s insurance claims.
Speaker and TV calibration: After physical install, run your receiver’s calibration routine. Set the TV to Movie or Cinema mode, not Vivid or Dynamic, these modes oversaturate colors and cause eye fatigue. Disable motion smoothing (the “soap opera effect”) and set HDMI inputs to full RGB range if your sources support it.
Tool list for typical DIY install:
- Cordless drill/driver and bits
- Stud finder
- Torpedo level and 4-foot level
- Drywall saw or utility knife
- Wire strippers and fish tape
- Socket set for lag bolts
- Non-contact voltage tester
- Safety glasses and gloves
Enhancing Your Theater with Smart Home Integration
Smart home platforms like Google Home, Alexa, or Apple HomeKit can control your theater with voice commands or automated routines. Set up a “Movie Time” scene that dims lights, lowers the screen, powers on the receiver, and switches to the correct input, all with one tap or voice prompt.
Lighting control: Smart dimmers or switches (Lutron Caseta, Leviton Decora) let you set lighting scenes. Install LED strips behind the screen or along baseboards for bias lighting, it reduces eye strain and improves perceived contrast. Use warm white (2700-3000K) LEDs to avoid blue glare.
Network performance matters. Streaming 4K HDR content requires at least 25 Mbps per stream. If your theater is far from the router, run Cat6 Ethernet during construction or use a mesh Wi-Fi system with a dedicated backhaul node near the theater. Buffering during the climax of a movie kills immersion.
Universal remotes: Logitech Harmony remotes (discontinued but still available used) or newer options like Sofabaton simplify control of multiple devices. Program macros so one button press executes a sequence, power on TV, switch receiver input, adjust volume. This beats juggling three remotes or training family members on a complicated sequence.
If you’re building new construction or doing a major remodel in DFW, consult with a low-voltage contractor early. Prewiring for speakers, network drops, and conduit runs is far cheaper and cleaner before drywall goes up than retrofitting later.
Permitting note: Most AV installations don’t require permits in DFW cities, but if you’re adding new circuits, moving walls, or doing structural work, check with your local building department. Electrical work typically requires inspection, and unpermitted work can complicate future sales or refinancing.