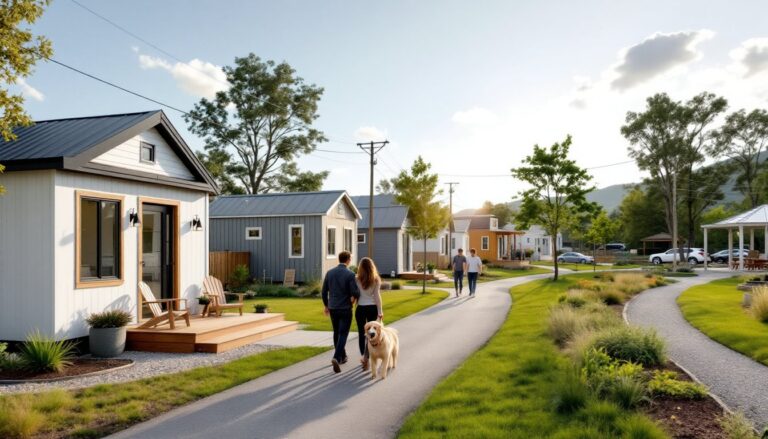
Choosing the right foundation for a tiny home isn’t just about what goes underneath, it determines where you can place it, whether you can move it, and how it meets local building codes. A foundation mistake means expensive fixes, permit headaches, or even structural failure. Unlike traditional homes, tiny houses range from fully mobile trailer-mounted units to permanent structures on dedicated lots, and each path requires a different base strategy. This guide breaks down the permanent and temporary options, what each one demands in terms of site prep and code compliance, and which foundation makes sense for your specific tiny home plan.
Table of Contents
ToggleKey Takeaways
- Tiny home foundation choice determines mobility, zoning classification, and compliance with building codes—trailer-mounted units are classified as RVs while permanent foundations trigger residential dwelling requirements.
- Concrete slab and pier-and-beam are the main permanent foundation options, with slabs costing $4–$7 per square foot and piers offering advantages for sloped or flood-prone terrain.
- Frost heave threatens structures in cold climates; tiny home foundations must extend below the local frost line (typically 36–48 inches in northern states) to prevent cracking and settling.
- Moisture control through proper vapor barriers, drainage, and ventilation is the most overlooked critical factor in tiny home foundation success—slabs require perimeter drainage while piers need adequate crawl space venting.
- Trailer-mounted tiny homes require heavy-duty frames rated 10,000–14,000 lbs GVWR with hurricane ties at joist connections, plus stabilizer jacks when parked; skid foundations offer lower-cost relocation for flat sites but face strict zoning scrutiny.
- A permanent foundation qualifies tiny homes for traditional mortgages and improves resale value, while trailer and skid options limit financing options but maximize flexibility for relocation.
Why Your Foundation Choice Matters for Tiny Homes
Foundation choice directly impacts mobility, zoning classification, and long-term durability. A trailer-mounted tiny home is legally considered a recreational vehicle in most jurisdictions, which opens up RV parks and certain private properties but often restricts residential zoning. Switching to a permanent foundation reclassifies the structure as a dwelling, requiring adherence to the International Residential Code (IRC) in most U.S. regions, that means frost footings, engineered load paths, and inspections.
Frost heave is a real threat in cold climates. If your foundation doesn’t extend below the local frost line (typically 36–48 inches in northern states), freeze-thaw cycles will shift and crack the structure. Tiny homes have less mass than conventional houses, so even minor settling or movement shows up as cracked siding, jammed doors, and out-of-square framing.
Moisture control is another critical factor. Without a proper vapor barrier and drainage plan, ground moisture migrates into flooring and wall cavities, fueling mold and wood rot. Pier foundations allow airflow underneath, while slabs require perimeter drainage and sealed edges. Each option handles water differently, and many home renovation tutorials emphasize proper moisture management as the single most overlooked step in small-structure builds.
Your foundation also affects resale and financing. Lenders rarely finance trailer-mounted tiny homes, but a structure on a permanent foundation may qualify for a traditional mortgage or construction loan. If future sale or refinancing is part of your plan, this distinction matters.
Permanent Foundation Options for Tiny Houses
Concrete Slab Foundations
A monolithic slab or frost-protected shallow foundation (FPSF) is the simplest permanent option for tiny homes on level lots. The slab is typically 4 inches thick with a thickened edge at the perimeter (usually 12 inches deep and 12 inches wide) that serves as both footing and frost protection. Rebar or wire mesh reinforcement is embedded in the concrete to prevent cracking.
Site prep involves excavating 6–8 inches, laying 4–6 inches of compacted gravel base, installing a 6-mil polyethylene vapor barrier, and placing 2-inch rigid foam insulation around the perimeter to meet energy code requirements. In cold climates, foam extends horizontally under the slab edge to prevent frost penetration, this is the core principle of FPSF design.
Concrete costs vary by region, but expect $4–$7 per square foot for materials and labor on a small slab (200–400 sq ft). A tiny home slab usually requires 3–5 cubic yards of concrete, which most suppliers deliver with a minimum charge that can inflate per-yard pricing on small pours. Ask about short-load fees upfront.
One downside: slabs require flat, well-drained sites. If your lot has a slope or poor drainage, you’ll need extensive grading and perimeter drains, which add cost and complexity. Plumbing runs must be embedded before the pour, so any layout mistakes become expensive to fix. Always pressure-test water and drain lines before concrete goes in.
Pier and Beam Foundations
Pier and beam systems elevate the tiny home on concrete footings or helical piers, with a grid of treated lumber beams supporting the floor frame. This approach works well on sloped, uneven, or rocky sites where grading for a slab isn’t practical. It’s also common in flood zones where elevation is required by FEMA and local floodplain ordinances.
Each pier consists of a concrete footing poured below the frost line (or a helical pier screwed into stable soil) topped with a precast concrete block or adjustable steel post. Beams are typically double 2×8 or 2×10 pressure-treated lumber (actual dimensions 1.5″ x 7.25″ or 1.5″ x 9.25″), spaced 4–6 feet on center depending on floor joist span and load. The foundation options discussion often highlights pier spacing as a common DIY mistake, undersizing or over-spacing piers leads to bouncy floors and cracked drywall.
Pier footings are typically 12 inches in diameter and extend 12–48 inches deep depending on soil type and frost line. Helical piers are faster and don’t require concrete curing time, but they cost more upfront and need specialized installation equipment. Expect to install 6–12 piers for a typical tiny home footprint.
Ventilation and moisture control are critical. The crawl space under a pier foundation needs vented openings (1 square foot of vent per 150 square feet of crawl space, per IRC) or a sealed crawl space with conditioned air and a sealed vapor barrier. Skipping this step invites moisture, pests, and frozen pipes.
Pier and beam foundations offer easier access to plumbing and electrical for future repairs, and they adapt to irregular terrain without massive earthwork. But, exposed crawl spaces require skirting (vinyl, metal, or pressure-treated plywood) to keep out animals and weather, and in cold climates you’ll need to insulate the floor and protect water lines from freezing.
Temporary and Mobile Foundation Solutions
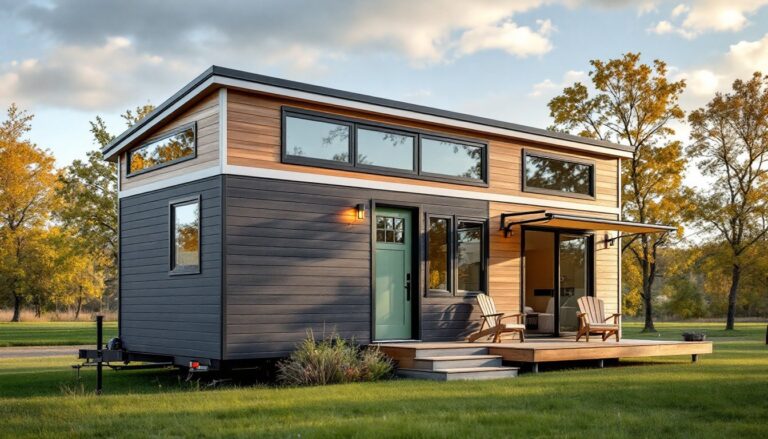
Trailer Foundations for Movable Tiny Homes
Trailer-mounted tiny homes sit on a flatbed utility trailer with a steel frame, axles, and wheels. This is the most common foundation for movable tiny houses, and it bypasses many building code requirements because the structure is classified as a towable RV, not a permanent dwelling.
Trailers for tiny homes are purpose-built with a heavy-duty steel frame rated for residential loads, not standard cargo trailers. Look for trailers rated at 10,000–14,000 lbs GVWR (Gross Vehicle Weight Rating), with dual axles and electric brakes. Frame construction should include welded steel crossmembers every 16–24 inches to support floor joists without sagging.
Width is a legal constraint. Most states allow up to 8.5 feet wide without an oversize load permit: anything wider requires escort vehicles, route planning, and higher transport costs. Length is less restricted but affects maneuverability, most tiny home trailers run 20–28 feet long.
Anchoring the tiny home to the trailer frame is critical. The house must be through-bolted to the steel frame at multiple points, not just lag-screwed to the deck. Floor framing should integrate hurricane ties or Simpson Strong-Tie connectors at every joist-to-frame connection to handle road vibration and wind loads during transport.
When parked, use leveling jacks or stabilizer jacks at each corner to transfer weight off the suspension and tires. Don’t rely on the trailer’s suspension for long-term support, tires degrade with UV exposure, and suspension components aren’t designed for static loads. Some owners remove wheels and set the trailer on concrete blocks or jack stands for semi-permanent placement, but check local codes, some jurisdictions require trailers to remain towable or they trigger building permit requirements.
Utility hookups are another consideration. Most trailer-based tiny homes use RV-style shore power (30 or 50-amp service), external water hookups, and black/gray water tanks or direct sewer connections. If you’re parking long-term on private property, you may need to run dedicated electric and plumbing, which can require permits depending on local rules.
Skid Foundations
A skid foundation uses two or more large treated timbers, typically 6×6 or 8×8 pressure-treated beams (actual size 5.5″ x 5.5″ or 7.25″ x 7.25″), as runners beneath the tiny home. The structure is built on top of the skids, which rest directly on level, compacted ground or a gravel pad. This setup allows the home to be dragged or lifted onto a flatbed truck for relocation, offering more mobility than a permanent foundation but more stability than a trailer.
Skids work best on flat, well-drained sites with stable soil. Compacted gravel base, 6–8 inches deep, is essential to prevent settling and moisture wicking. The skids themselves should be set parallel and level, spaced to match the home’s floor framing, usually 6–8 feet apart for a typical tiny house width.
Advantages include simplicity and cost savings. There’s no need for axles, tires, or steel trailer frames, and construction can start immediately without waiting for a custom trailer build. Skids also distribute weight more evenly than point-load piers, which can help on softer soils. Many DIY project guides recommend skids for garden sheds and small cabins where occasional relocation is desired but highway towing isn’t required.
Disadvantages are limited mobility and code challenges. Moving a skid-mounted home requires a tractor, forklift, or crane, and it’s not street-legal for highway transport. Zoning officials may classify a skid foundation as permanent or semi-permanent, triggering building permits and setback rules. Always check with your local building department before starting, a skid-mounted tiny home may need to meet the same code as a permanent structure, depending on jurisdiction.
Skids also offer less clearance than piers or trailers, so ventilation and moisture control require extra attention. Install a heavy-duty vapor barrier (at least 6-mil poly, preferably 10–15 mil reinforced) over the gravel base and up the sides of the skids. Without adequate airflow or vapor protection, ground moisture will migrate into the floor system and cause rot.
For long-term placement, some builders add gravel-filled trenches or concrete footings under each skid to improve load distribution and prevent sinking. This hybrid approach blurs the line between skid and pier foundations but can provide better performance on marginal soils.