Building or converting a tiny home to run entirely on solar power isn’t just a feel-good eco move, it’s a practical way to cut utility costs, gain energy independence, and live off-grid if that’s the goal. But cramming a functional solar system into 100–400 square feet of living space requires careful planning. You can’t just slap a few panels on the roof and call it done. From sizing your array to choosing the right battery bank, every watt matters when your home fits on a trailer. This guide walks through the components, calculations, and installation considerations to help DIYers make informed decisions about going solar in a tiny home.
Table of Contents
ToggleKey Takeaways
- A solar powered tiny home combines energy independence with reduced utility costs by using monocrystalline panels and lithium battery storage sized to match your daily consumption.
- Calculate your daily energy needs by auditing all devices and their runtimes, then account for phantom loads and seasonal variation to properly size your solar array and battery bank.
- Lithium iron phosphate (LiFePO4) batteries are the standard for off-grid tiny homes, offering 3,000–5,000 charge cycles and minimal weight compared to lead-acid alternatives.
- Proper installation requires working at height safely, using code-compliant wire sizing, securing batteries with ventilation, and testing each component incrementally before full system operation.
- Regular maintenance—including panel cleaning, cable connection checks, and battery monitoring—extends your solar system’s lifespan to 20+ years while maximizing efficiency.
What Is a Solar Powered Tiny Home?
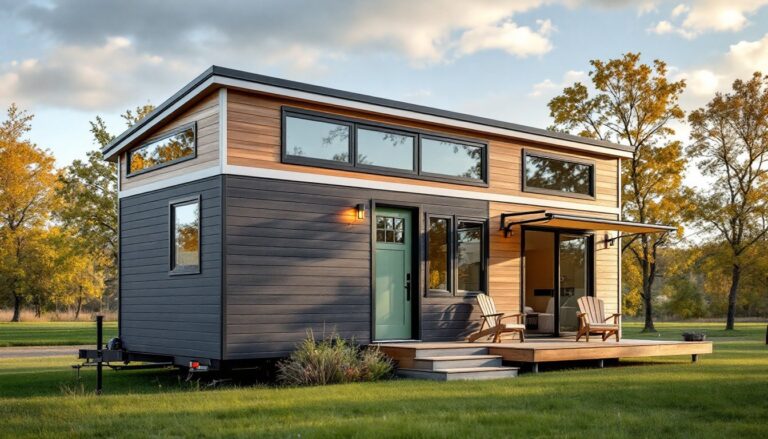
A solar powered tiny home is a dwelling, typically under 400 square feet, that relies entirely or primarily on photovoltaic (PV) panels to generate electricity. These homes often sit on trailers for mobility, though some are built on permanent foundations. The solar system replaces or supplements grid power, storing energy in batteries for use after dark or during cloudy weather.
Most tiny home solar setups are off-grid, meaning they operate independently of the utility grid. Others use grid-tied systems with net metering, feeding excess power back to the utility and drawing from the grid when solar production falls short. Off-grid systems require more robust battery storage and careful energy management, since there’s no backup power source if your batteries run dry.
The size and design of the solar array depend on the home’s energy load, roof area, and travel habits (if mobile). A stationary tiny home on a sunny lot can support larger panels and ground-mounted arrays. A mobile unit needs to account for wind resistance, weight distribution, and panel durability during transit. Either way, the goal is the same: match your power generation to your consumption without oversizing the system or draining the budget.
Benefits of Going Solar in Your Tiny Home
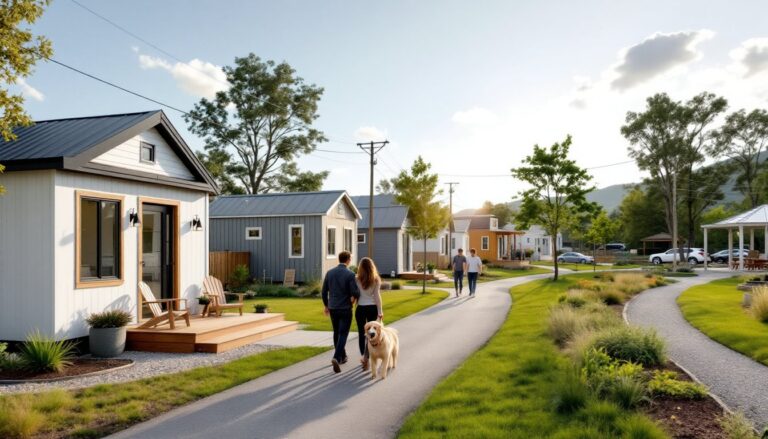
Energy independence tops the list. With a properly sized solar system, you’re not tethered to campground hookups or utility poles. You can park on raw land, a friend’s backyard, or a remote plot and still run lights, appliances, and climate control. For full-timers in mobile tiny homes, this freedom is the whole point.
Lower operating costs add up fast. After the upfront investment, sunlight is free. You’ll eliminate or drastically reduce monthly electric bills. In states with net metering, grid-tied systems can even earn credits during peak production months. Battery prices have dropped significantly since 2020, making off-grid setups more affordable than ever.
Environmental impact matters to many tiny home owners, but it’s worth noting the practical angle: solar systems produce zero emissions during operation and require minimal maintenance. No fuel deliveries, no generator noise, no exhaust fumes. For homeowners interested in small space living ideas, solar power aligns with the minimalist ethos of tiny home culture.
Finally, resilience. Grid power can fail during storms, wildfires, or equipment failures. A solar-powered tiny home with adequate battery storage keeps running regardless of what’s happening beyond your property line. That reliability has real value, especially in rural areas with aging infrastructure.
Essential Solar Components for Tiny Homes
Solar Panels and Mounting Systems
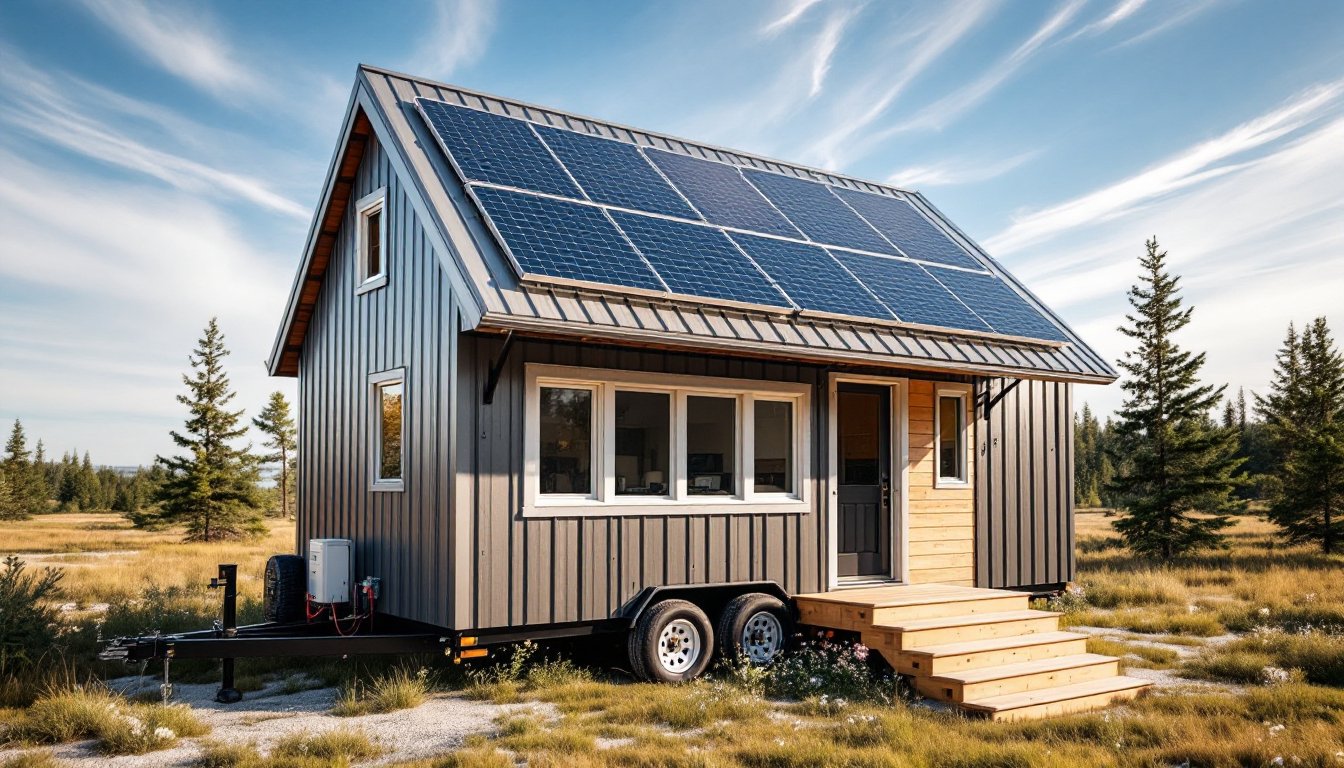
Monocrystalline panels are the go-to for tiny homes. They deliver higher efficiency (18–22%) than polycrystalline panels, which matters when roof real estate is limited. A typical tiny home roof can accommodate 4–8 panels, each producing 300–400 watts under ideal conditions. Aim for panels rated for high wind resistance (at least 2,400 Pa) if your home travels frequently.
Mounting hardware must account for roof material and travel stress. Low-profile mounts reduce wind drag but offer less tilt adjustment. Tilt mounts improve winter performance by angling panels toward the sun, but they increase height and wind resistance. Use stainless steel hardware and apply butyl tape or Dicor sealant at all penetrations to prevent leaks. If you’re building a mobile tiny home, every roof penetration is a potential water entry point, overkill on sealant is better than a leak three states from home.
For homes on permanent foundations, ground-mounted arrays are worth considering. They’re easier to access for cleaning and maintenance, can be positioned for optimal sun exposure regardless of roof orientation, and don’t add weight to the structure. Use concrete footings or helical piers depending on soil conditions. Check local building codes: some jurisdictions classify ground-mounted solar as an accessory structure requiring a permit.
Battery Storage and Inverters
Lithium iron phosphate (LiFePO4) batteries have become the standard for off-grid tiny homes. They handle deeper discharge cycles than lead-acid, last 3,000–5,000 cycles, and weigh significantly less, critical when you’re watching trailer weight limits. Budget 200–400 amp-hours (Ah) at 24V or 48V for a typical tiny home setup. Higher voltage systems reduce wire gauge requirements and improve efficiency in larger arrays.
The inverter converts DC power from batteries to 120V AC for household appliances. A pure sine wave inverter is non-negotiable if you’re running sensitive electronics, medical equipment, or modern appliances with digital controls. Size the inverter for your peak load plus 20% overhead. A 2,000–3,000W continuous inverter handles most tiny home needs, but if you’re running power tools, a microwave, and a window AC simultaneously, you’ll need more capacity.
Many modern systems use an inverter-charger or all-in-one system that combines solar charge controller, inverter, and battery management. Brands like Victron, Renogy, and Sol-Ark offer units designed for off-grid residential use. These simplify wiring and reduce failure points, though they’re pricier than piecing together separate components. For those exploring home automation reviews, integrating solar monitoring with smart home systems offers real-time visibility into energy production and consumption.
Charge controllers regulate power flow from panels to batteries. MPPT (Maximum Power Point Tracking) controllers are more efficient than PWM types, especially in cold weather or partial shade. Size the controller to handle your array’s maximum output with 25% overhead for safety.
Calculating Your Tiny Home’s Energy Needs
Start with a load audit. List every device you’ll use, its wattage, and daily runtime. A 60W LED bulb running 4 hours a day consumes 240 watt-hours (Wh). A 150W laptop charging 3 hours uses 450 Wh. A 1,500W space heater running 2 hours burns 3,000 Wh. Add it all up. Most tiny homes land between 1,500 and 4,000 Wh per day, depending on climate control, cooking methods, and lifestyle.
Don’t forget phantom loads, devices that draw power even when off. Phone chargers, WiFi routers, and appliance standby modes can add 10–20% to your daily consumption. Use a Kill A Watt meter to measure actual draw: manufacturer specs often underestimate real-world usage.
Once you have daily watt-hours, calculate battery capacity. If you use 3,000 Wh per day and want two days of autonomy (to handle cloudy weather), you need 6,000 Wh of storage. Divide by your system voltage: 6,000 Wh ÷ 24V = 250 Ah. Factor in a 50% depth of discharge for lithium batteries to extend lifespan, so you’d spec a 500 Ah bank. That’s overkill for most setups, 250 Ah at 24V is more typical for moderate use.
For solar array sizing, divide daily consumption by average peak sun hours in your location. Peak sun hours aren’t daylight hours: they represent equivalent hours of full 1,000 W/m² sunlight. Phoenix gets 6–7 peak hours in summer: Seattle might see 2–3 in winter. If you need 3,000 Wh per day and average 4 peak sun hours, you need at least 750W of panels (3,000 ÷ 4 = 750). Add 25% for system losses (wire resistance, inverter efficiency, dust on panels), bringing you to roughly 940W, three 300W panels would cover it.
Seasonal variation matters. A system sized for summer use will underperform in winter unless you oversize the array or reduce consumption. Many tiny home owners adjust habits seasonally: more propane heating in winter, more solar-powered cooling in summer.
Installation Tips for DIY Enthusiasts
Safety first. Solar work involves working at height, handling high-voltage DC circuits, and penetrating your roof. Wear fall protection if you’re more than six feet up. Use insulated tools and a multimeter to verify circuits are dead before touching wires. Lithium batteries can discharge hundreds of amps in a short circuit, one wrong wrench can weld metal or start a fire.
Plan your layout before drilling anything. Panels should face true south (in the Northern Hemisphere) with minimal shading from trees, vents, or roof features. Use a Solar Pathfinder or smartphone app to assess shading throughout the year. For hands-on DIY tutorials, detailed solar layout guides can walk through panel placement and wiring runs.
Run wire sized appropriately for current and distance. Use the National Electrical Code (NEC) voltage drop tables or an online calculator. Undersized wire wastes power as heat and can cause fires. Tiny homes often use 10 AWG or 8 AWG for panel-to-controller runs, and 2/0 or 4/0 for high-current battery-to-inverter cables. All outdoor and exposed wiring must be in conduit, PVC for budget builds, metal conduit for maximum protection.
Mount batteries securely and ventilate the compartment. Even LiFePO4 batteries can vent gases under fault conditions. Bolt them to the floor or a sturdy shelf, and use a battery box if they’re in living space. Install a battery disconnect switch so you can isolate the system for maintenance or emergencies.
Permitting and inspection vary widely. Some jurisdictions treat tiny homes as RVs (no permit needed for 12V systems), others require full electrical inspections for any dwelling. Grid-tied systems almost always need utility approval and an inspection. Call your local building department and utility before ordering components. If your tiny home is mobile, you’re generally exempt from building codes while traveling, but you’ll need to comply wherever you park long-term.
Test the system incrementally. Install panels, verify open-circuit voltage. Connect the charge controller, confirm it’s regulating properly. Add batteries, check charging behavior. Finally, connect the inverter and loads. Troubleshooting is far easier when you isolate each component rather than energizing the whole system at once and hunting for problems.
Finally, monitor and maintain. Clean panels every few months, dust and bird droppings cut efficiency. Check battery voltage and state of charge weekly until you understand your usage patterns. Tighten cable connections annually: vibration from travel or thermal cycling can loosen terminals. A well-maintained solar system in a tiny home can run 20+ years with only minor component replacements.